Target Filter View  
HOWTO video on Target Filter View
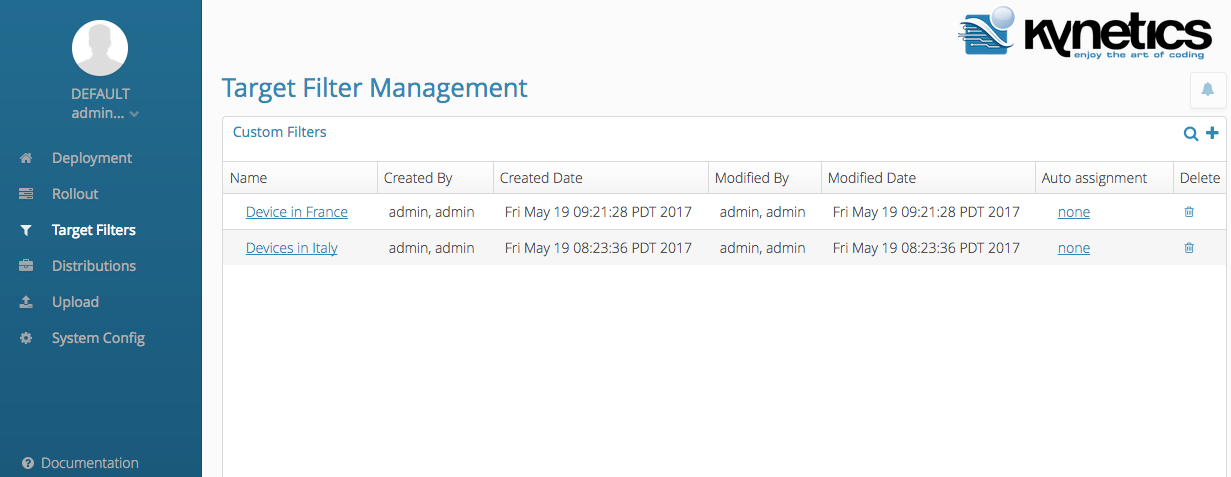
Figure 1
Note
The filters created in the Target Filter View can be applied in the Deployment and Rollout views as seen in Figure 2 and Figure 3 below:
Filters
Deployment View
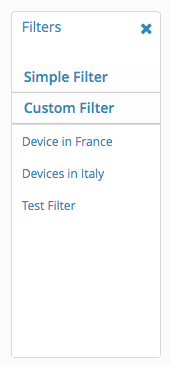
Figure 2 - Deployment View - Custom Filter
Rollout View
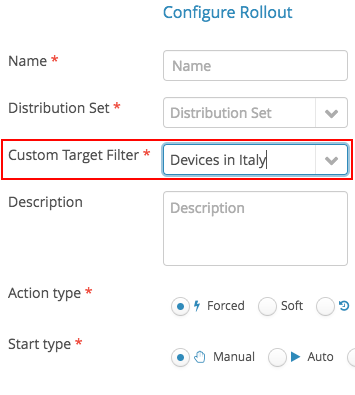
Figure 3 - Rollout View -- Custom Target Filter
Add (Plus icon)
![]()
To create a custom filter in the Target Filter View, click the Plus icon on the top right of the screen.
Search
![]()
Clicking the Search icon will enable the user to query by any string inside the container.
Create Filter
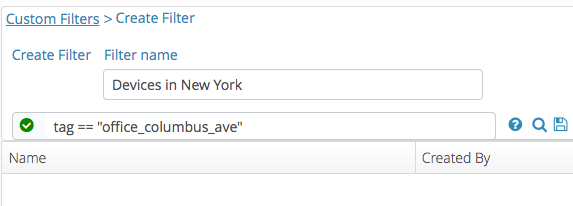
Figure 4
You will need to define the Filter Name and also a query. In the example above we have:
Filter Name: Devices in New York
Query: tag=="office_columbus_ave"
In this case, a query for the tag "office_columbus_ave" will be applied. This means that any Target Device which has the tag "office_columbus_ave" associated to it will be a result.
Other Query Examples
| Query | Description |
|---|---|
updatestatus==error |
Displays all target devices in "error" state |
controllerid!=192.160.10.24 |
Displays all targets that don't have the controllerid 192.168.10.24 |
name==*nitro* |
Displays all targets which contain the term "nitro" in their name. |
name==*nitro* or description==*nitro* |
Displays all targets that either have the term "nitro" in their name or description. |
name==*warp* and description==*warp* |
Displays all targets that have the term "warp" in their name and their description |
name==warp* and updatestatus==pending |
Displays all targets with their name starting with "warp" which are in "pending" state. |
(assignedds.name=='Web Content' and description==Plug) or updatestatus!=error |
Displays all targets which are either assigned to the "Web Content" distribution and have description equals to "Plug" or which are not in error status. |
installedds.name=='Hello World app' and installedds.version=='1.1' |
Displays all targets which have completed installation of the "Hello World app" distribution at version "1.1". |
(updatestatus!=In_sync or updatestatus!=error) and name==*warp* |
Displays all targets that don't have the updatestatus In_sync or error and which also contain the term "warp" in their name. |
(updatestatus!=error or updatestatus!=pending) and (name==*warp* or description==*warp*) |
Gives all targets that either have the term "warp" in their name or their description and also either have the update status not in state error or pending. |
createdat=ge=1738670400000 |
Displays all targets which were created on or after Tuesday, 4 February 2025 12:00:00. The value is a timestamp expressed as UTC in milliseconds. |
lastmodifiedat=gt=1736758800000 |
Displays all targets which were modified after Monday, 13 January 2025 09:00:00. |
lastcontrollerrequestat=lt=${OVERDUE_TS} |
Displays all targets which are overdue (last poll occurred more than "Polling Overdue Time" ago) |
Android Service Query Examples
The UF Android Service provides several built-in attributes regarding itself and the Android OS it runs on. In the Deployment View select a target and open the "Attributes" tab to see all the attributes (built-in and custom) provided by a device.
Here are some example queries using the built-in attributes:
| Query | Description |
|---|---|
attribute.client_version_code=ge=v020000 |
Displays all target devices running UF Android Service with client_version_code v020000 or greater (release v2.0.0 and later). Usage of client_version_code is recommended in place of client_version.Version codes can be obtained by consulting the Service releases table. |
attribute.client=="Android" and attribute.client_version_code=lt=35 |
Displays all target devices running UF Android Service with client_version_code smaller than 35 (any release before v1.5.0). |
attribute.client_version_code=ge=33 or attribute.client_version_code=IN=(10600,10601,10602,10700,10701) |
Displays all target devices running UF Android Service with client_version_code 33 or greater (release v1.4.0 and later). Due to an issue releases with codes 10600,10601,10602,10700,10701 have to be listed explicitly to be included in the list. |
attribute.android_version==12 and attribute.system_update_type==AB |
Displays all targets devices running on Android 12 and using AB double copy OTA updates |
attribute.android_build_type=="user" and attribute.android_keys=="release-keys" |
Displays all targets with Android build type "user" and signed with the release keys |
attribute.android_version==12 and attribute.android_build_date=lt=20230704 |
Displays all targets devices running on Android 12 and having Android OS build date earlier than July 4, 2023 |
Supported Operators
| Operator | Symbol |
|---|---|
| Equal | == |
| Not Equal | != |
| Greater than or equal | =ge= |
| Less than or equal | =le= |
| Greater than | =gt= |
| Less than | =lt= |
| 'In' parameter (field matches an element in the set) | =IN= (Example: name=IN=(target1,target2)) |
| 'Out' parameter (field does not match any element in the set) | =OUT= (Example: name=OUT=(target5,target9)) |
| Wildcard | * |
Auto Assignment
HOWTO video on Auto-assignment
The Auto Assignment is a feature that allows to apply a distribution to devices that match a target filter. The main differences with rollouts are:
- Auto Assignment applies also to devices that are yet to poll for the first time (or, in other words, that are not yet among the registered Targets)
- the filter is periodically checked to find and assign targets that match the corresponding query, until the Auto Assignment is stopped
Query complexity
Auto Assignment filter is periodically run by the server to find targets that match the corresponding query. Overly complicated queries should not be used, to avoid overloading the servers. In particular, the query should use at most one attribute. Use rollouts instead, if complicated queries are involved.
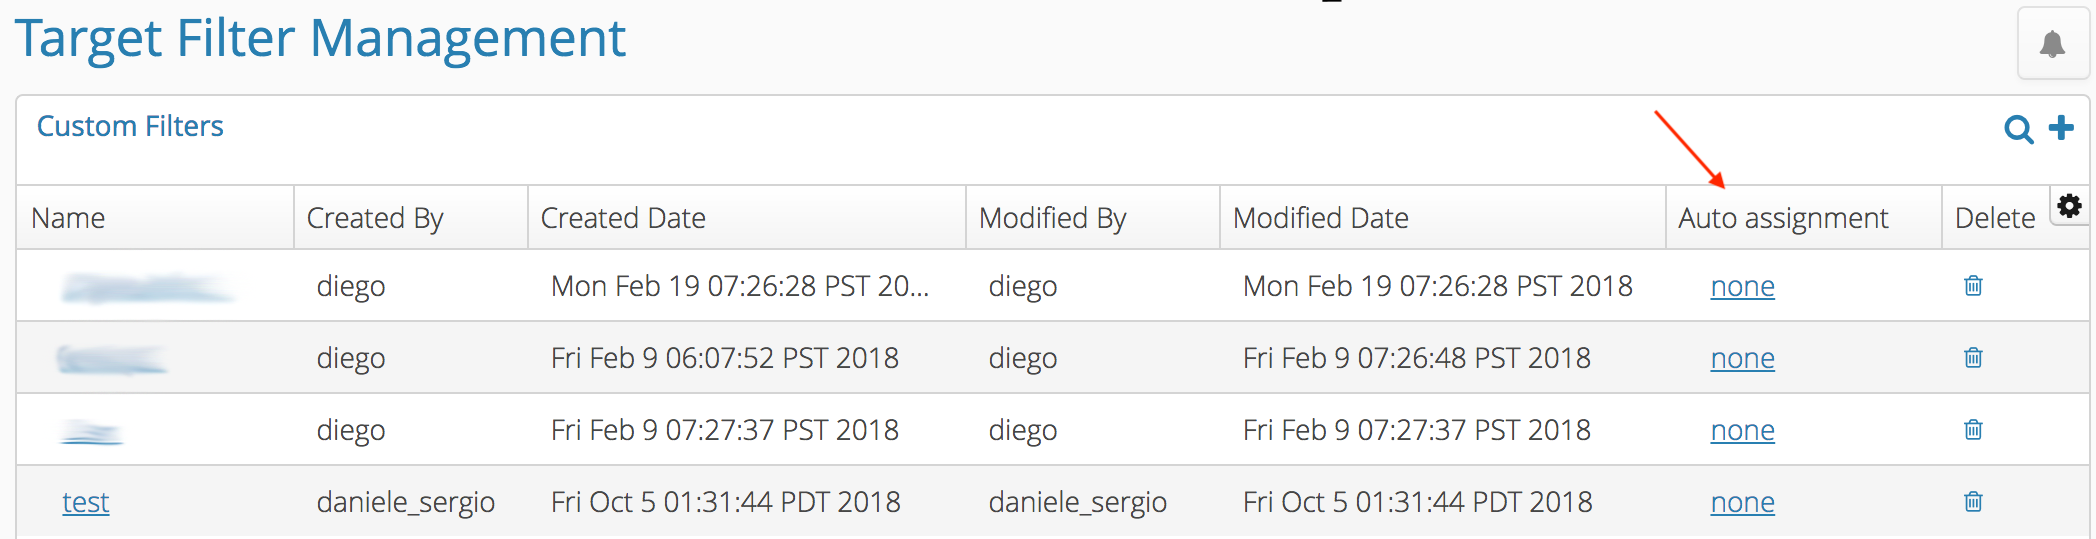 Figure 5
For example the createdat=ge= query from the Other Query Examples table can be used to trigger the application of a distribution to devices that poll for the first time on or after the defined UTC time.
Once you've defined a custom filter, navigate to the Auto assignment column under Target Filter View and click on the none link in your custom filter row (see Figure 5).
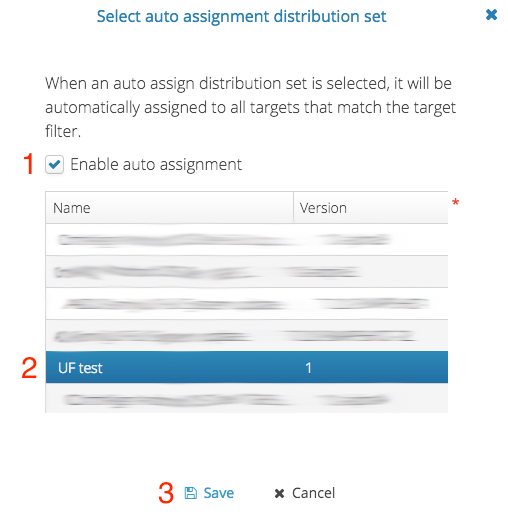
Figure 6
On the next popup window that appears, you will enable the auto assignment feature, select a distribution to apply in the list, and then choose save.